HostGator is one of the popular hosting companies for WordPress bloggers. Although EIG is the sole parent company behind HostGator, Bluehost, and many other companies, the services of these companies vary widely. For example, you can get a cheap shared hosting plan with HostGator for as little as $3.50 for unlimited websites. If you have a small blog or are just starting out with a blog, HostGator is definitely a good option. In this article, we will explain how to set up your WordPress blog on HostGator shared hosting.
Shared Hosting vs WordPress Hosting
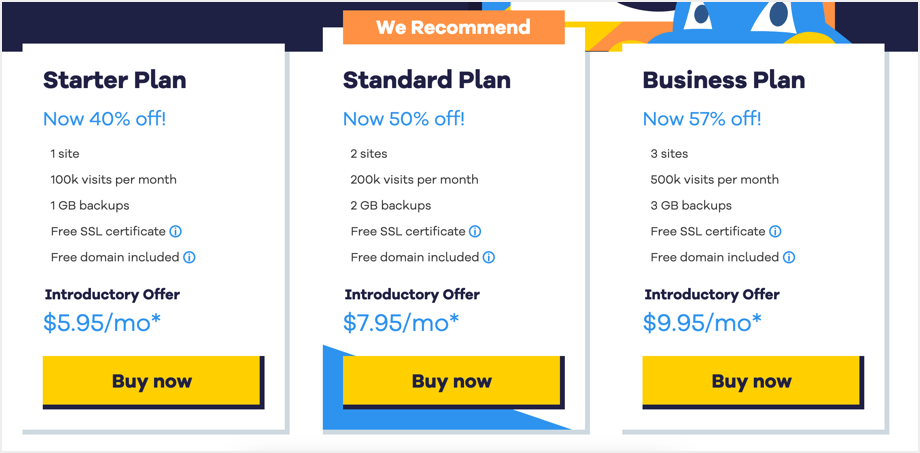
Before we get started, we want to clarify the difference between shared hosting and WordPress hosting plans offered by HostGator. The cheapest WordPress hosting plan is the starter plan, which you can get for $5.95 per month. It has a limit of 1 site and 100K visits per month. It comes pre-installed with WordPress and you can start building your site right away.
On the other hand, you can get shared hosting for as little as $2.75 per month for a single site with the Hatchling plan. You can get the Baby plan for $3.50 per month for unlimited websites with no bandwidth limit. The only difference is that you need to install WordPress using the Softaculous one-click installer.
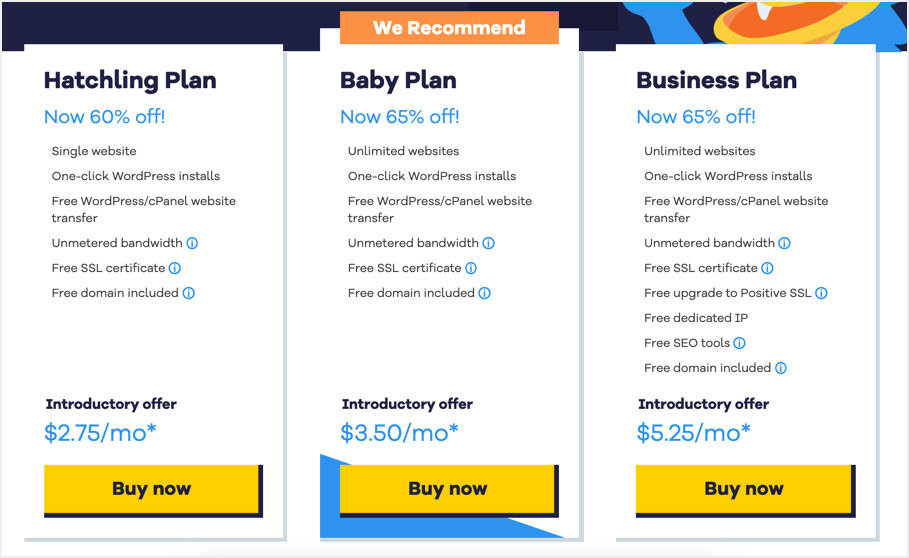
In our opinion, you can purchase the Baby plan and install WordPress instead of paying more for WordPress hosting plans.
Buying a Shared Hosting Plan from HostGator
Go to the Shared Hosting page of the HostGator website and click the Buy Now button.
Domain selection
The first step in setting up your WordPress blog on HostGator is buying a domain for your site. You can get a domain free for one year or use a domain purchased from another registrar. We recommend purchasing a domain from GoDaddy, NameCheap or any other registrar for a lower price. While you can get a free domain with a first year hosting plan, it will cost you $17.99 to renew it.
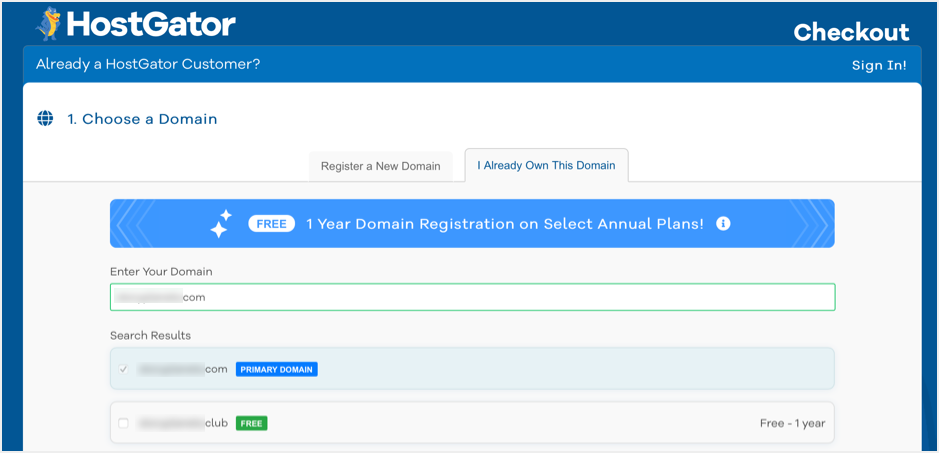
Enter your domain name to select it as the primary domain for your hosting account. If you buy a Hatchling plan, then this will be the only domain you can use on your account. For Baby plans and above, you can add additional domains to cPanel using the “Additional Domain” feature. HostGator will offer to purchase other domain extensions that you may not want to pay attention to.
Choice of contract term
In the next step, you will automatically see the plan you selected. In this article, we will walk you through buying the Baby plan and setting up a WordPress blog on HostGator. The price will change depending on the payment cycle you choose. Three years (36 months) is the longest term available, and you can get the Baby plan for $3.50 at almost 65% off. If you want to test out HostGator shared hosting, choose the Hatchling monthly plan, which will cost you $10.95 per month.
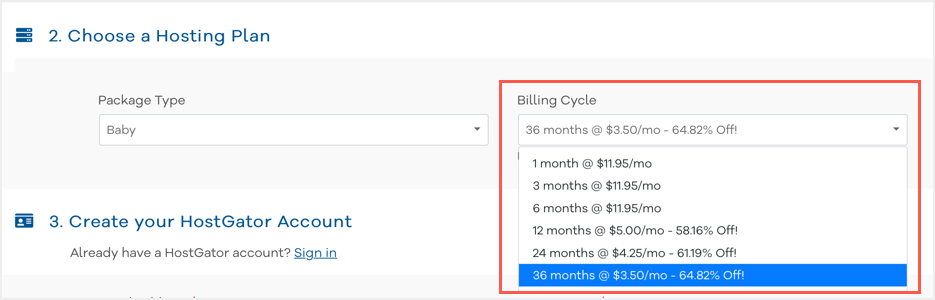
Remember that after the billing cycle ends, you need to renew your hosting account at a much higher cost. You can see the actual renewal rate below the current billing cycle field.

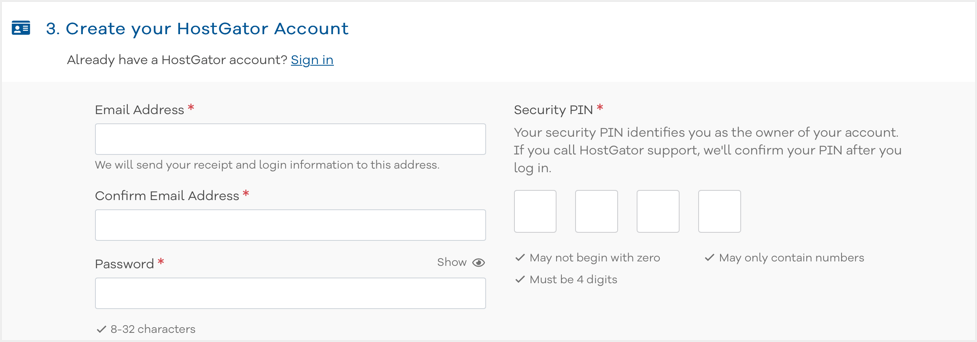
Create an account
The next step is to fill in your email address and password to create an account. This will be the login details for your hosting account and you need to remember the password to login to your account from the HostGator portal. You also need to enter a 4-digit PIN in order to use it when contacting support.
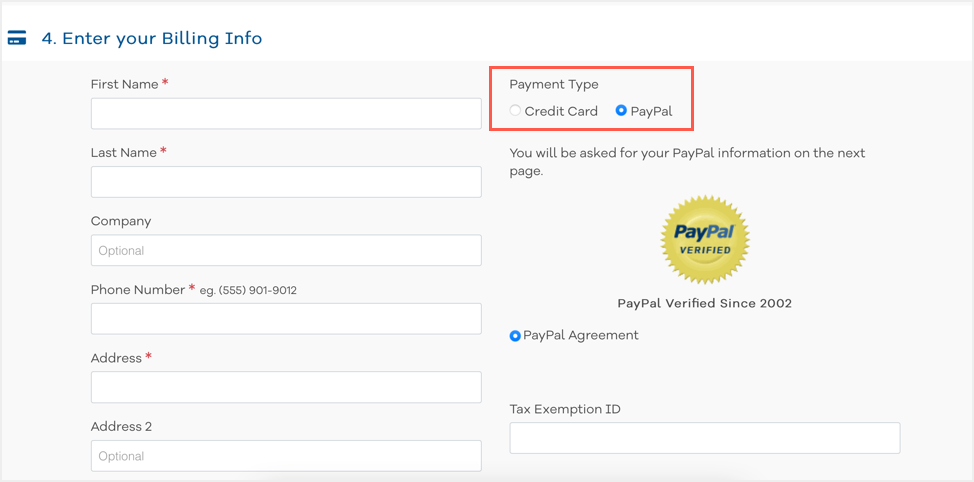
Select a Payment Method
HostGator offers payment by credit card or PayPal account. You don’t have to worry too much about paying as you get a 45-day money-back guarantee on your purchase. Enter your name and billing address details to continue.
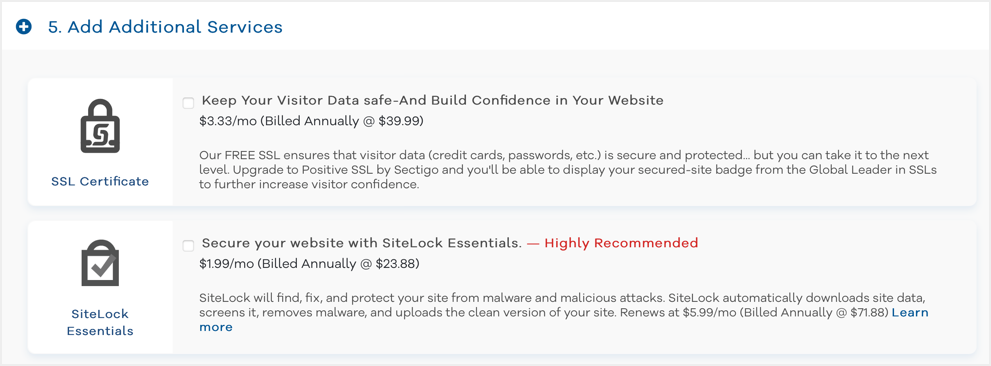
Deselect additional services
HostGator offers several additional services to support your hosting account. For example, for an additional fee, you can get your own Gmail, SiteLock, Positive SSL, etc. By default, HostGator will choose a few services, such as SiteLock. Don’t forget to deselect all of these optional add-ons. You can purchase them at any time later.
Check coupon and price
In the following steps, you will see HostGator automatically apply a coupon code such as SNAPPY. If you have a different coupon code, please try entering it in the field and confirm it. Finally, make sure the price is discounted according to the plan you choose.
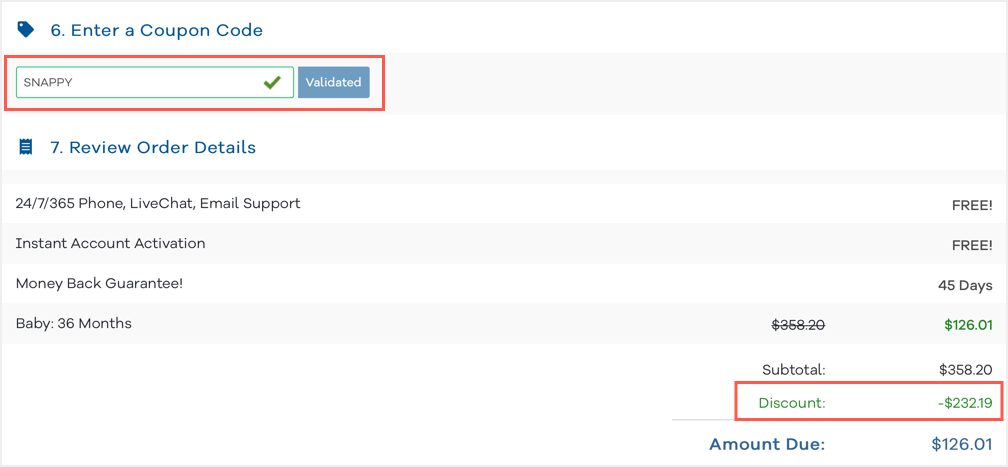
It takes up to 24 hours for hosting companies like DreamHost to manually verify your billing information before activating your account. The good thing is that HostGator will instantly activate your hosting account after payment.
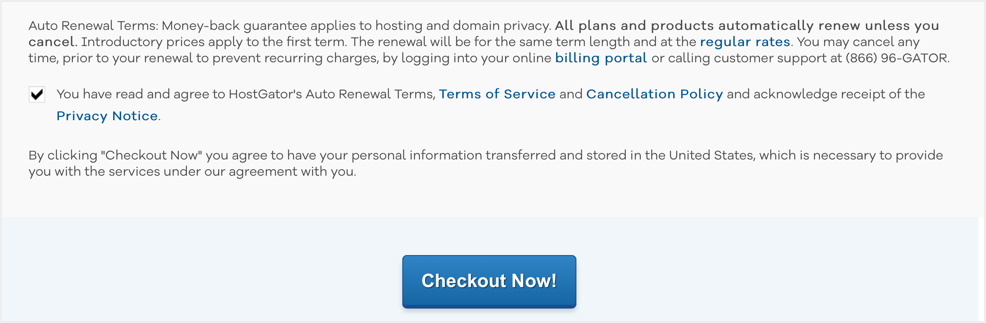
Make a payment
After checking the amount, click the “Checkout” button.
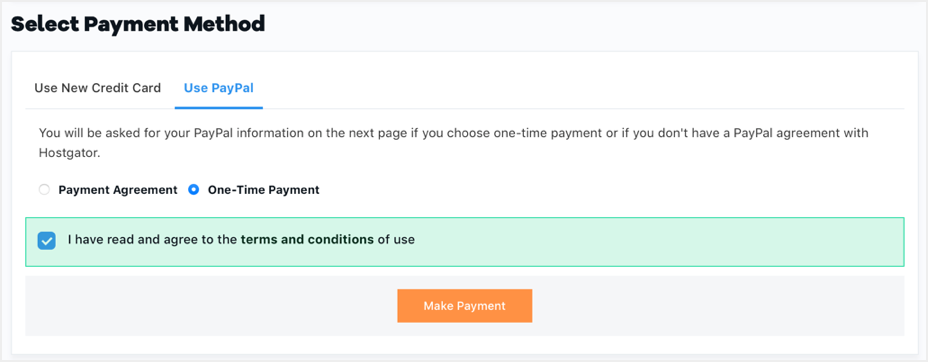
If you selected PayPal, you will see a screen to confirm payment with a PayPal agreement or a one-time payment. Select an option and click the “Make a payment” button.
Check nameservers and SSL in hosting account
After successful payment, you will see that the hosting account is activated instantly, showing your website name as the main domain.
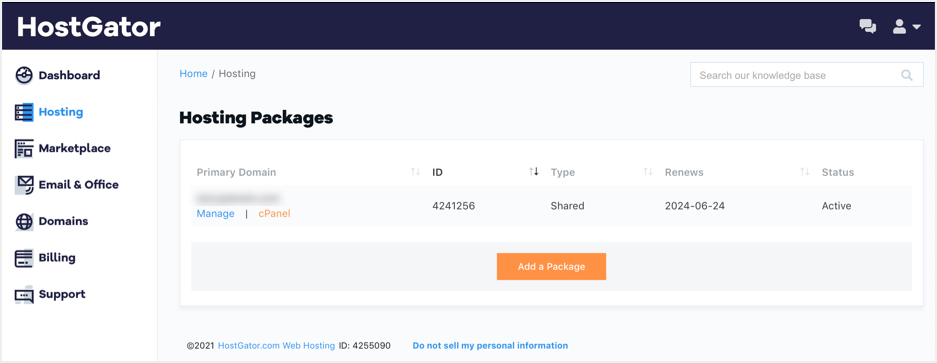
There are a few steps you need to take before setting up a WordPress blog on HostGator to publish your content. If you want to change your domain’s name servers to point to HostGator servers, click the Hosting section and get the name server details. Check out this article on how to change nameservers on your GoDaddy account, you’ll need to follow similar instructions if you purchased your domain elsewhere. If you purchased a free domain from HostGator, DNS zones will be configured automatically and you won’t need to make any changes.
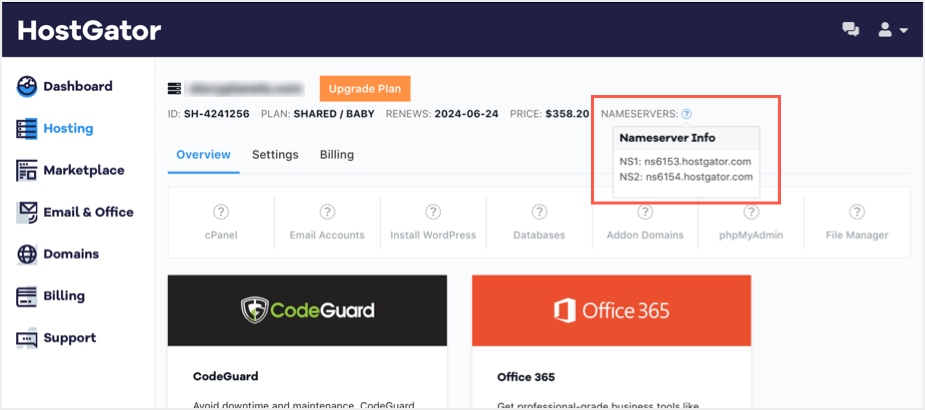
Click the cPanel link displayed below the domain name to enter the cPanel section. Here you will get all the applications for your domain and will be able to manage the server. The first thing you need to do is install an SSL certificate on your domain.
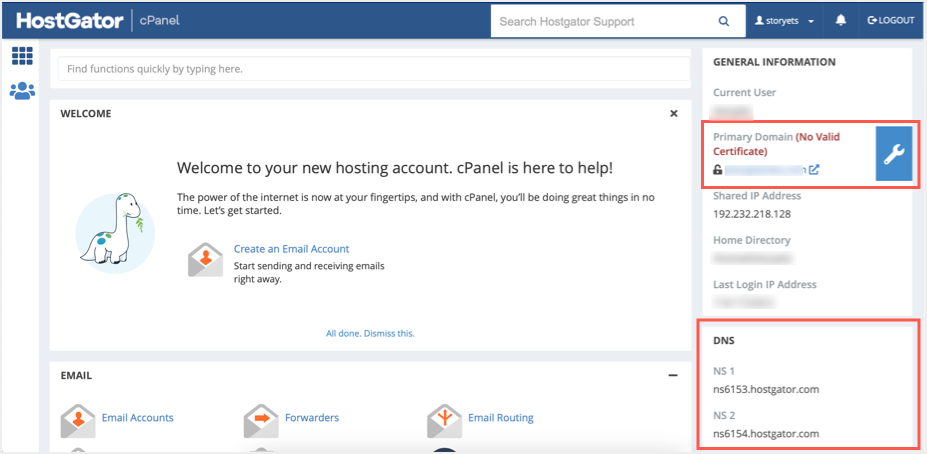
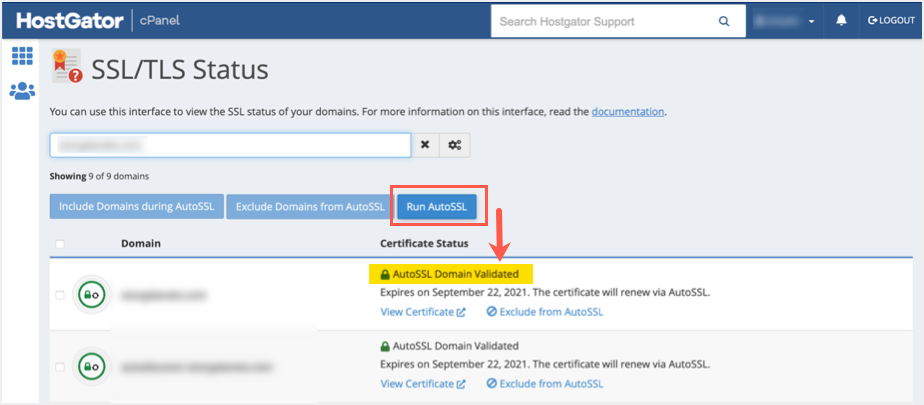
You can see the information showing “No valid certificate” on the right sidebar. Click the wrench icon or search for SSL in the search box to navigate to the SSL/TLS Status app. HostGator will automatically run AutoSSL verification and install the certificate on your domain. However, you must specify the nameservers as described above in order to successfully install the SSL certificate. You can also click the “Start AutoSSL” button and start the process manually. After successfully installing the certificate, you will see the status “AutoSSL Domain Validated”.
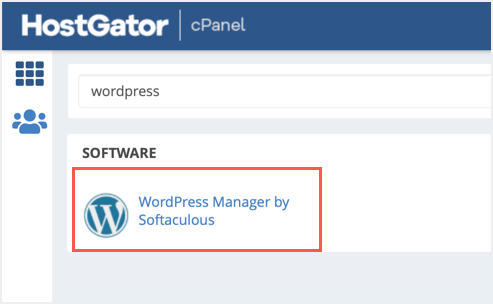
Installing WordPress on HostGator
Now that your domain is ready, the next step is to install WordPress on it. HostGator offers a one-click Softaculous installer to install WordPress and other applications on your domain. Type “WordPress” into the search box to find and open the “WordPress Manager by Softaculous” app.
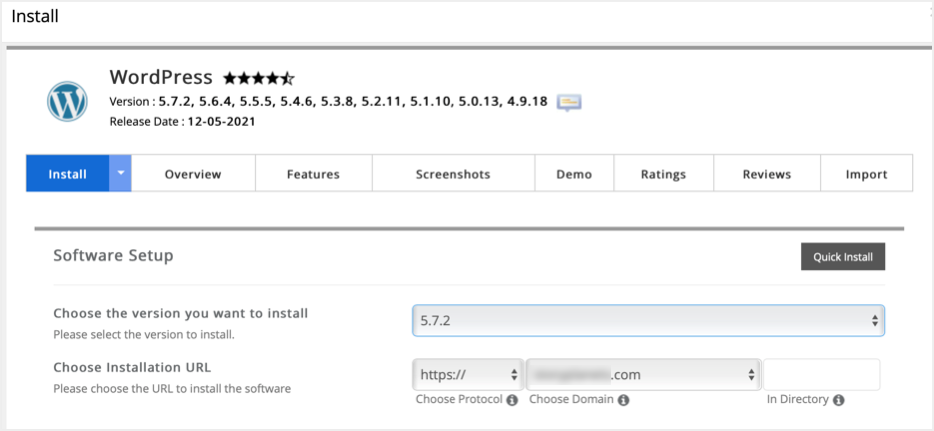
You will be taken to the Softaculous installer section and click the Install button to begin the WordPress installation process.

You can use “Quick Install” or provide all the information according to your needs. We recommend that you specify all the details, such as the database name, table prefix of your choice, instead of choosing the “Quick Install” option. Select the latest version of WordPress and choose an installation URL. Here, don’t forget to select the version with https and www or without www if you need to.
Scroll down and enter a title and description for your site. Don’t worry about this as you can change them after installing WordPress. However, choose whether you want to use a multisite or single site installation. For normal use, you should choose to install on a single site and therefore do not check the box for multiple sites.
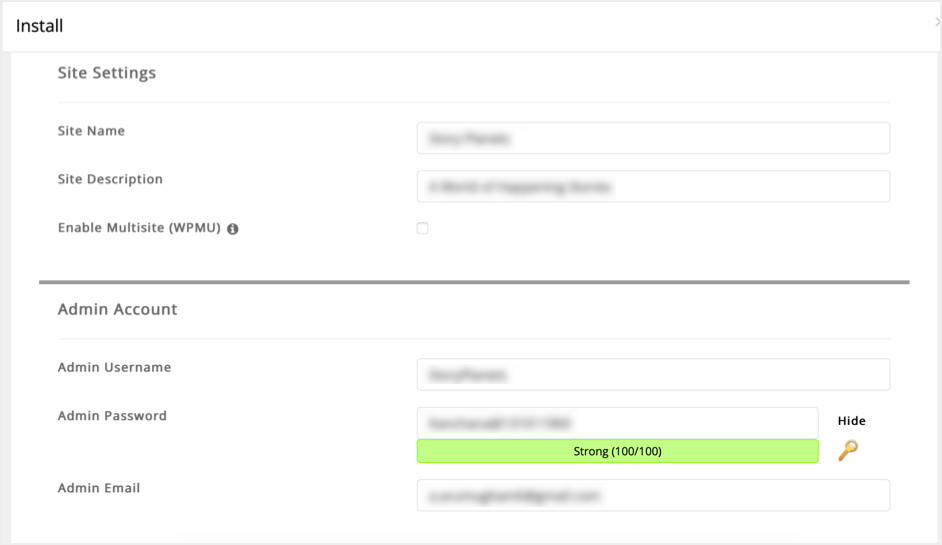
In the next section, provide the administrator username, password, and email addresses. These are the login credentials for the WordPress admin panel, and don’t confuse them with the HostGator login credentials. You can login to WordPress using your username or email address and a password. You cannot change the admin username from the admin panel, so enter the correct admin username.
Related Articles:
Select language, database, plugins and theme
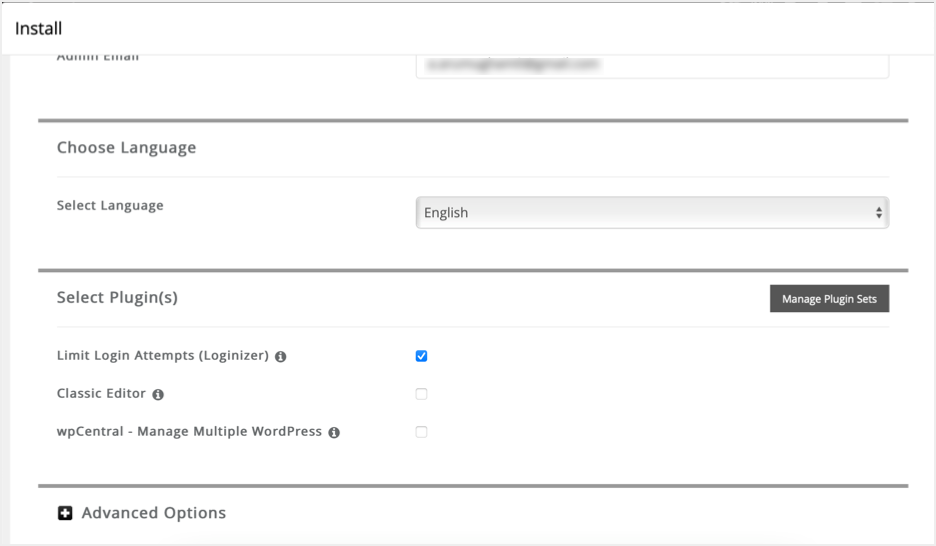
In the next section, select your language for the admin interface and select plugins to install on your site. You can ignore all the plugins shown here as after installation you will get different plugins and you can manually install any plugins later.
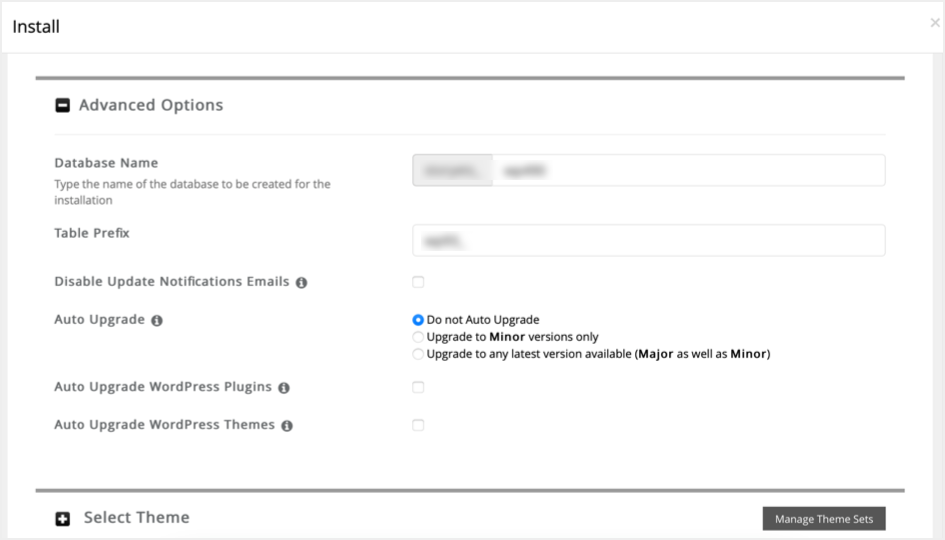
Click Advanced Options and provide a name for your database, then enter a prefix for the database tables. By default, WordPress will add “wp_” as a suffix to all database tables. However, for security reasons, it is recommended to change this prefix to your own. Disable automatic updates for WordPress, themes, and plugins to avoid layout issues with your site when automatically updated.
The last step is to choose a theme for your site. We recommend that you skip this step and install WordPress with the default twenty-twenty-one theme or similar. You can change the theme later in the admin panel.
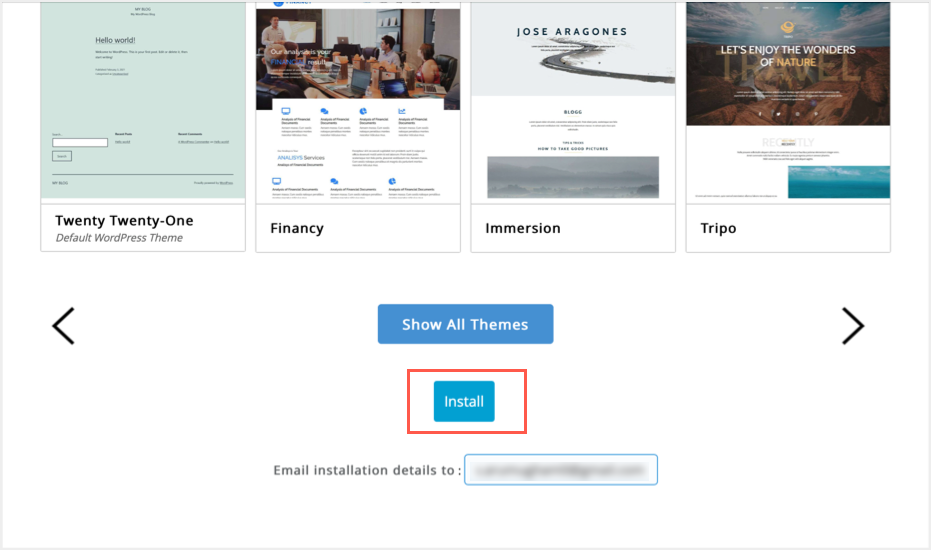
Enter your email ID in the “Send installation information to:” field to receive all the information in your email inbox for easy reference. Click the “Install” button to start installing WordPress on your site.
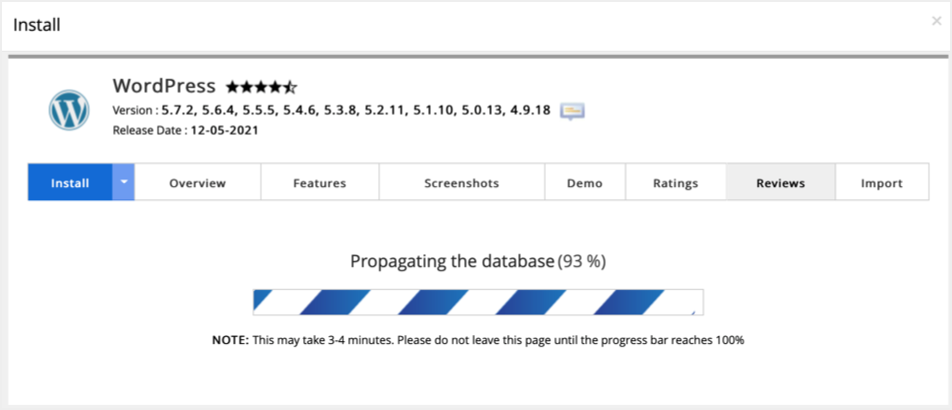
The process will take less than a minute to complete and you will receive a success message along with your login details.
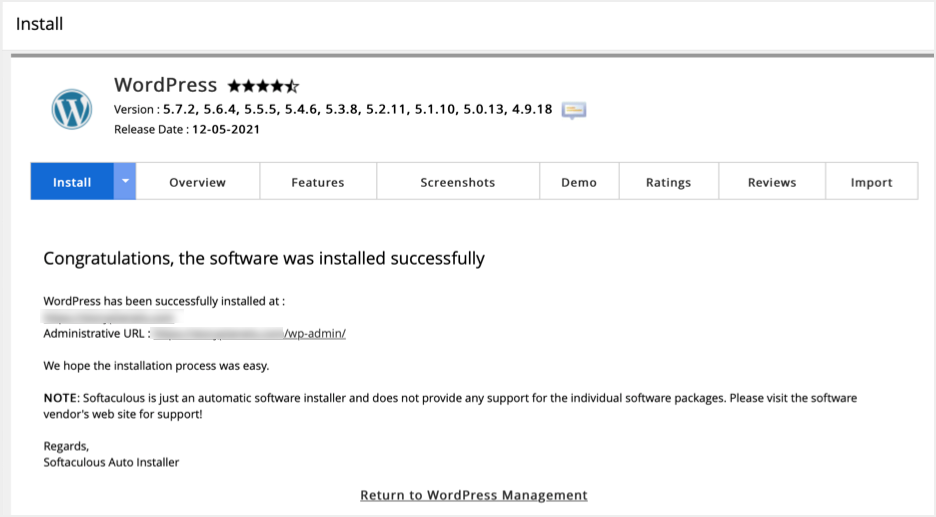
It’s all!!! Your WordPress blog is ready in a HostGator shared hosting account. Click on your admin URL to be taken to the WordPress admin login screen.
Setting up the admin panel
Login to your admin panel with the username and password you provided. HostGator will add several plugins like OptinMonster, WPForms, MOJO Marketplace, Jetpack, Akismet, etc. You can disable plugins you don’t need and remove them before creating content. You can also install a maintenance mode plugin to put your site on maintenance until content is published.

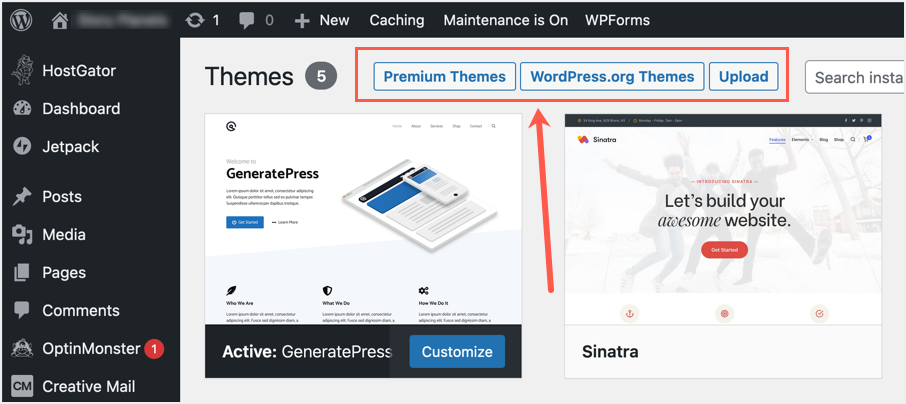
Similarly, go to Appearance > Themes and select WordPress.org Themes to get free themes from the WordPress repository. You can install GeneratePress, Astra or any other plugin to replace the default plugin. Alternatively, you can go to the Premium Themes section and purchase a theme from the MOJO Marketplace.
Start building your blog
We recommend that you first clean up the interface by removing all unnecessary plugins and themes. Leave only what you need to create content. Now everything is ready!!! Go to the Pages or Posts section and start building your content with the Gutenberg block editor.
Final words
As you can see, when setting up HostGator shared hosting, the WordPress installation process takes longer. However, this should take less than 30 minutes if your domain is new. If you don’t want to waste that time, then pay more and choose a WordPress hosting plan. Both shared hosting plans and WordPress hosting plans offer site migrations from other cPanel providers such as Bluehost. You can fill out the form or chat with the support team for more information about switching from other companies. Because many companies like SiteGround don’t offer cPanel setup, you may need to manually backup and migrate your existing site to HostGator.