Google AdSense is the most popular way for publishers to monetize their online content. You must be approved by Google in order to advertise on your site. Previously, you could show ads on any number of sites after your account was approved. Currently, you need to get approval for each site before you can create an ad code for that site. However, it is easy to add subdomains and subdirectories to an existing account. In this article, we’ll explain how to add subdomains to your Google AdSense account.
Subdomains and subdirectories
add subdomains to my Google AdSense AdSense First, you do not need to obtain additional permission to display ads on your subdomains and subdirectories. You can use the same ad unit created for your main domain on subdomains and subdirectories of the same domain. In fact, Google will automatically serve ads on subdomains and subdirectories if you have enabled auto-advertising for the main domain.
Since many users confuse subdomains and subdirectories, here are the basics:
- Subdomains are any prefix added to your main domain in a specific format.
- Subdirectories are any suffix added to your main domain in a specific format.
Below are some examples of subdomains and subdirectories and how they work in your AdSense account.
| Domain | Subdomain or subdirectory | Additional approval | Add to your account | Automatic advertising |
|---|---|---|---|---|
| example.com | blog.example.com www.example.com forum.example.com |
Not | Yes | Yes |
| example.com | example.com/blog example.com/forum |
Not | Not | Yes |
This way you can add subdomains to your AdSense account without having to add subdirectories.
What are the benefits?
You may be wondering why your AdSense account has the ability to add subdomains. In the AdSense reporting section, you can create separate reports for the main and subdomains. This is very useful when you have multiple subdomains and want to track earnings separately.
Note that it is also possible to track traffic separately for subdomains using Google Analytics. So if you have different people managing subdomains, it’s a good idea to track Analytics and AdSense data separately.
How to add subdomains to Google Adsense?
Follow the instructions below to add subdomains to your main domain:
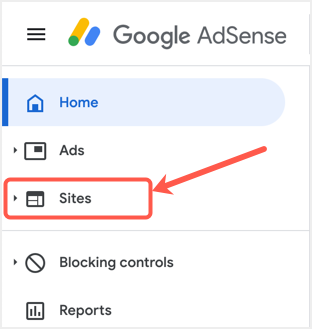
- Log into your AdSense account and go to the “Sites” menu.
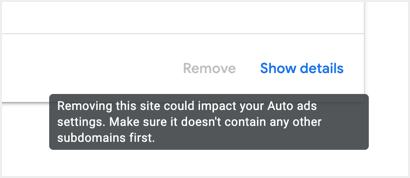
- In the Overview section, click the small down arrow next to your domain, and then click the Show Details link.
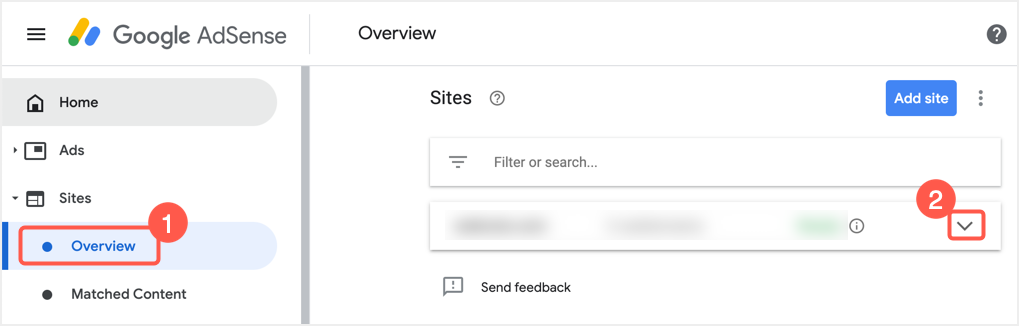
- This will open the “Manage Subdomains” section, where you can view previously added subdomains, if any.
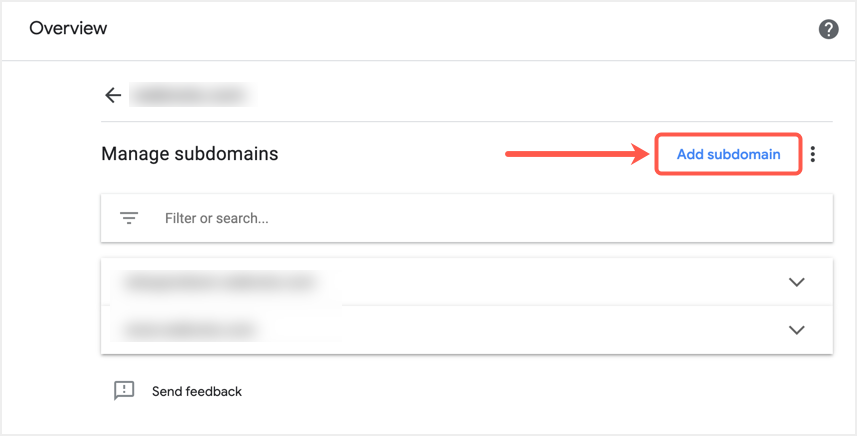
- To add a new subdomain, click the Add Subdomain link.
- Enter the correct URL for your subdomain and click Add.
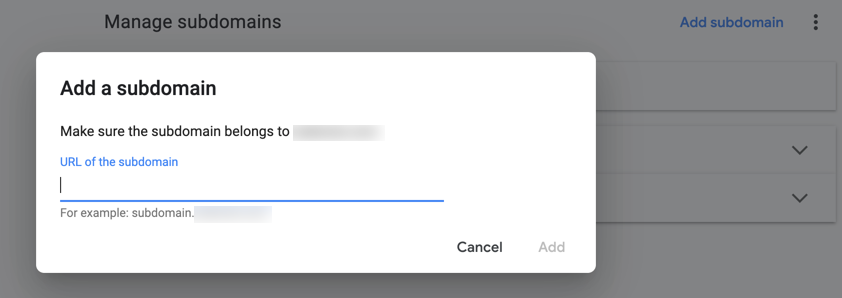
- You will see that the subdomain has been added to the list.
Now you can see the reports, and the subdomains will be displayed separately on the dashboard cards.
Note: In case you want to remove the main approved domain from your account, you will first need to remove all subdomains in that domain.
Manage automatic advertising on subdomains
As mentioned, Google will automatically serve automated ads such as anchor, vignette, and ads with relevant content on your subdomains. This works when you have any ad units on the subdomain site pages without having to paste the code in the header section. If you don’t want auto ads to appear on subdomains, be sure to exclude pages or the entire subdomain in your auto ad settings.
Final words
Subdomains are usually created for additional sections of the site, such as the forum and blog. If you have this set up, you can add them to your AdSense account on the main domain and start tracking earnings. However, be sure to follow the AdSense policies and implementation guidelines for subdomains to avoid violations.