When creating content on your website, you must keep in mind that websites are viewed all over the world. For this reason, it is worth translating your website, even if a significant portion of your readers are from a specific location. Also, if you are looking to expand your online store to new markets, or simply improve the online experience for people from all over the world, adding translation capabilities to your site is a great idea. In this article, we’re going to take a look at the benefits of integrating the Google Translation widget into your WordPress site, as well as a plugin to help you set it up seamlessly.
Why Use Google Translate?
The artificial intelligence capabilities of Google are getting closer to human intelligence, and translating content with Google Translate has the following advantages:
- Google Translate makes it easy to use by automatically translating your site into over 100 different languages.
- This helps remove any potential language barriers that might prevent customers from making purchases or reading your blogs.
- Since people prefer to use the web in their language, integrating Google Translate into your WordPress site helps increase organic traffic and keep visitors on your site longer.
Plugins to Customize Google Translate in WordPress
Google Language Translator Plugin
Install the Google Language Translator Plugin
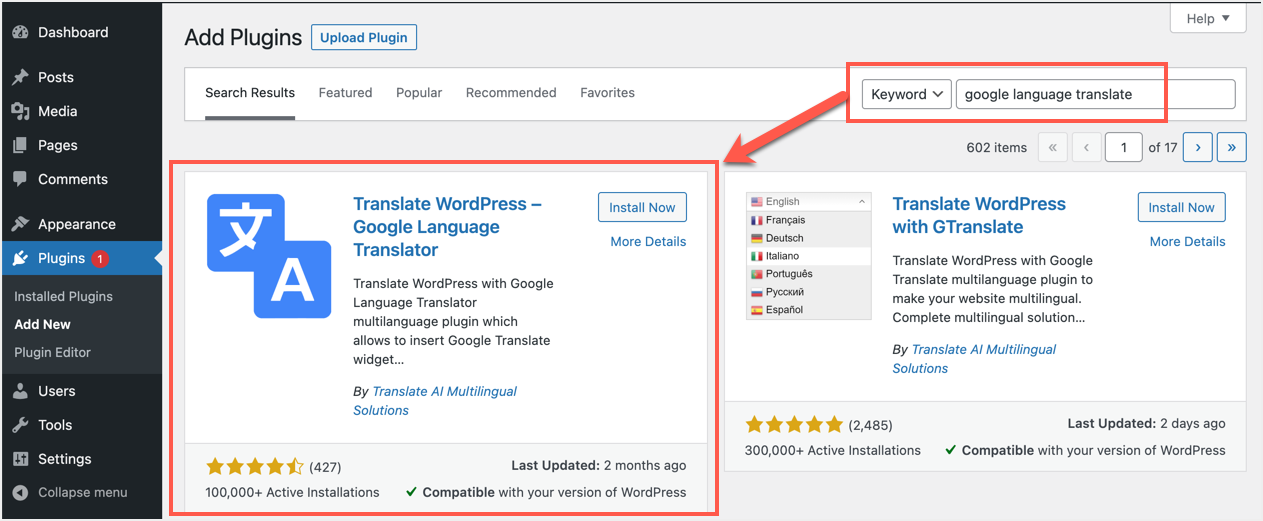
- First, login to your WordPress dashboard and go to Plugins > Add New.
- Search for “google language translate” to find the Google Language Translator Plugin .
- Click the install button and then activate it on your site.
Set up the Google Language Translator Plugin
The plugin offers an easy to use interface where you can select languages and add country flags.
- First, make sure the “Check this box to activate” box next to “Plugin status” is checked to start using the plugin on your site.
- Select the default language for your website, this is the original language of your content.
- Then select the languages to translate. The options you select here will be shown on the live site so that your users can choose to have content translated into that language. Here you will notice that some languages are already selected. Make sure you choose the ones you need.
- Select the checkbox size and reorder to change the appearance of the translation widget. The plugin shows a preview that you can view to get an idea of how it will look on your published site.

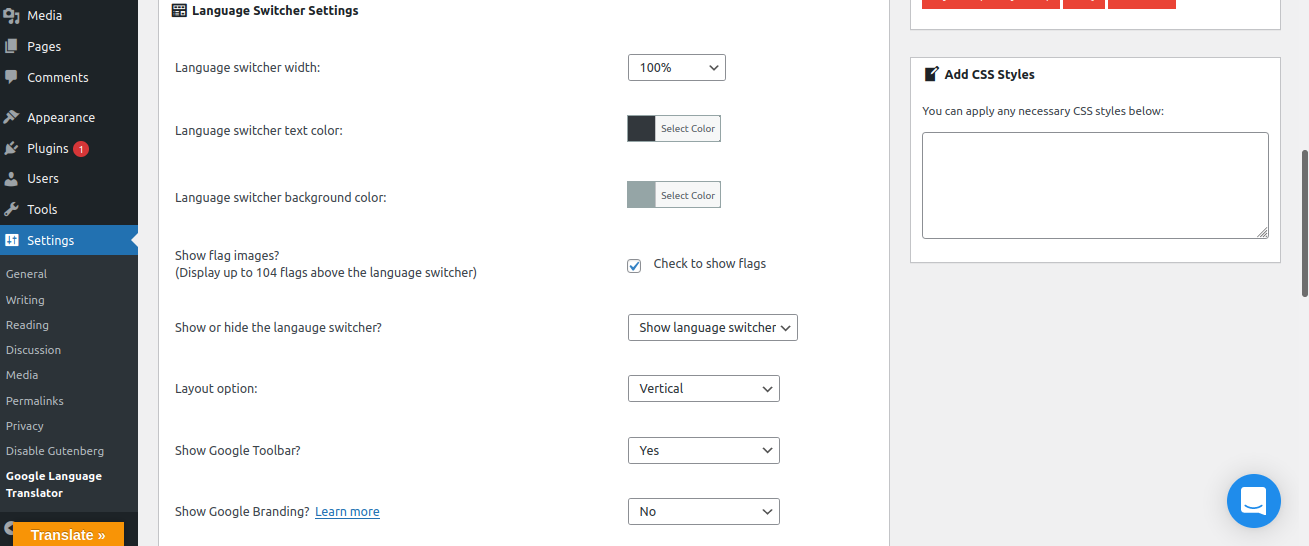
- After that, scroll down to “Language switcher settings” and adjust the width of the language switcher from the drop-down menu.
- Select your preferred language switcher text color and language switcher background color.
- Check the “Check to display flags” checkbox if you want to display flag images.
- Choose your preference to show or hide the language switcher, layout option, choose whether to show the Google toolbar, and choose whether to align the translator to the left or right.
Show translation widget
The plugin offers several ways to insert the translation widget into your site. You can use a floating widget or use a shortcode and insert the widget anywhere. In addition, you also have a widget that can be inserted into the sidebar or footer area. Although there are several options available, we recommend using one that matches your site’s layout.
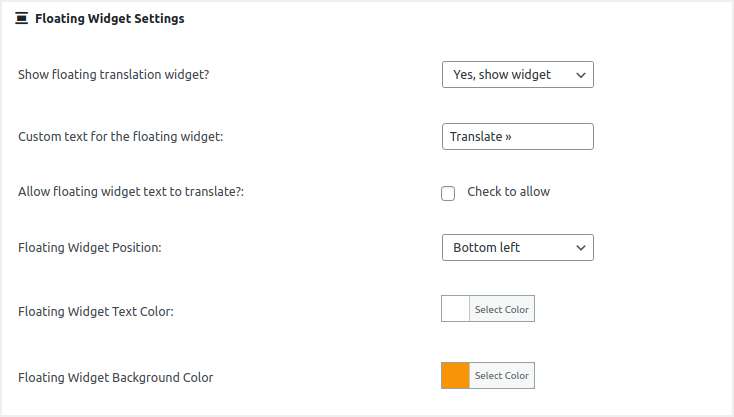
- Go to the “Floating Widget Settings” section and choose whether to display the floating translation widget.
- Set your own text for the floating widget and choose the position of the floating widget.
- Select the text color of the floating widget and the background color of the floating widget.
- Finally, go to the Usage section tab. You will see shortcodes to use on pages, posts, sidebar, header, footer, menus, and page templates. If you want to put one language in the WordPress menu, click the link at the bottom of the usage tab and you will see the recommendations.
- Scroll down and click the “Save Changes” button to apply the changes.
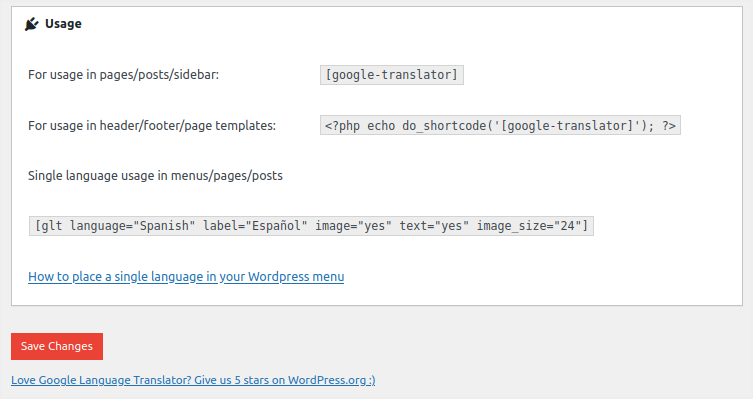
You can paste the shortcode anywhere in your post or page to showcase the translation widget. Otherwise, use the template code to paste into your theme’s template file so that the widget is displayed in the appropriate place.
Adding a Sidebar Translation Widget
In many cases, simply showing a translation widget in the sidebar is sufficient, and the Google Language Translator plugin offers a great widget for this purpose.
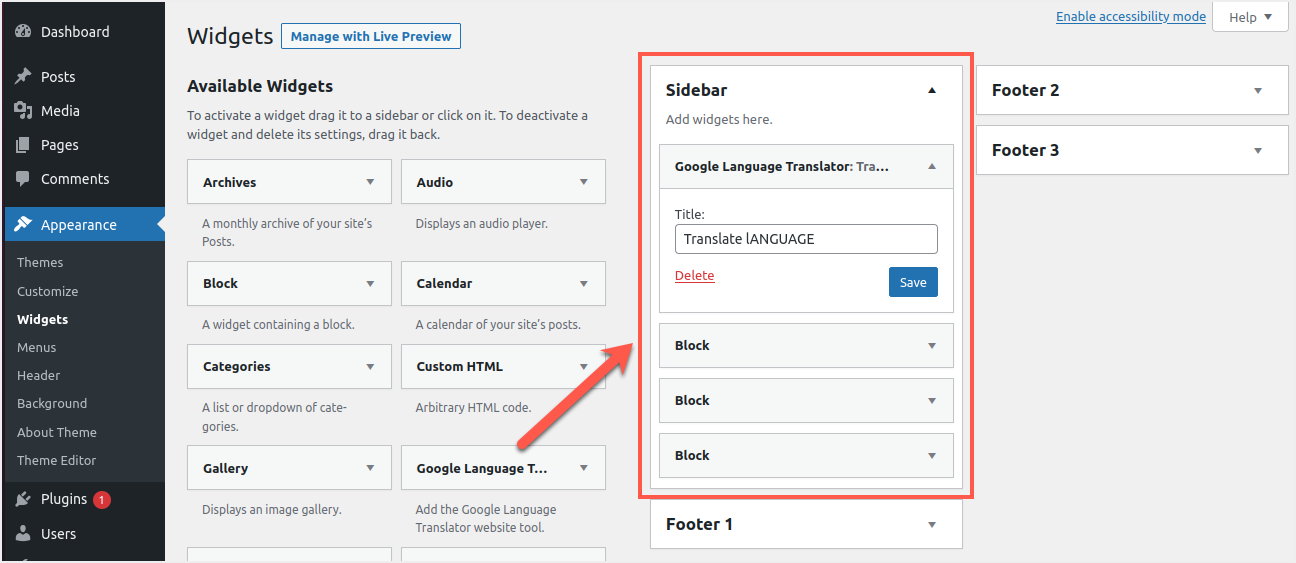
- Navigate to “Appearance” and select “Widgets” from the drop-down menu that appears.
- Add the Google Translate Widget to your site’s sidebar by dragging and dropping it. Please note that we have shown the use of the classic widget editor, which was removed from WordPress version 5.8. You may need to use the Gutenberg block editor to insert the widget.
- Finally, click the “Save” button to apply the changes.
- You can now view the translate button on your website. All a visitor has to do is click on it and select their desired language, and the content will be translated immediately.
- The image below shows what your site would look like with the translate button.

Considerations when translating your website
As you can see, inserting a translation widget with the Google Language Translator plugin is very easy. However, not many people offer translation services for the following reasons.
- Often automatic machine translation looks funny and does not convey the correct meaning of the original content.
- Google services are blocked in many countries, such as China, where this translation widget will not appear on your site.
- Although the impact of page load speed with this plugin is minimal, it will still affect the page speed score with issues such as render blocking and stripping unused JavaScript.
- Free translation will not provide any SEO benefits as the URL will remain the same.
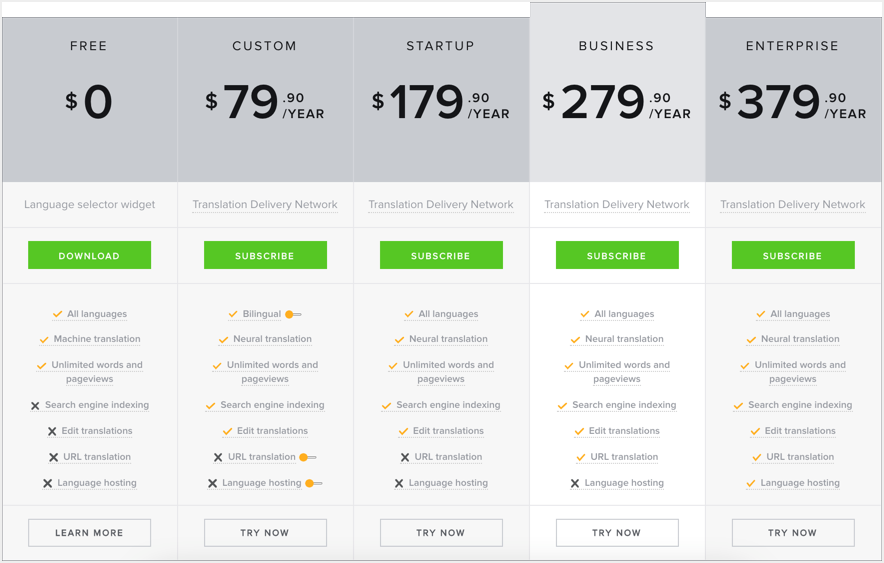
You can solve page speed issues with powerful caching plugins like WP Rocket. However, you may need a premium version of the plugin to solve other translation issues. As mentioned, the premium version allows you to view and edit automatically translated content so it looks natural. In addition, you will get a separate URL in a subdomain or with a subdirectory to take advantage of local search results. But the service for bilingual communication requires $79.90 per year, while you need $179.90 per year to use all language options.
Since this is an expensive service for individual bloggers, make sure you actually need to offer translation services on your site. Sometimes, for some reason, you may want to test and see if this plugin works well for your site before you pay for it. In this case, you have nothing to worry about because the plugin has a 15-day trial and only new customers are eligible for this trial. If you find this inappropriate, you can cancel your subscription at any time during the trial period and you will not be charged.
Note: The Google Language Translator plugin is now part of GTranslate. Although there are still two free plugins available in the WordPress repository, the premium version is the same version that you need to purchase from the GTranslate website.