WordPress is becoming popular due to its easy to use interface. WordPress design eliminates the need for coding and makes it easy to create websites. Then why make changes to a WordPress site? HTML (Hyper Text Markup Language) comes in handy when adding additional features, advanced features, or troubleshooting your site by editing its code. There are many ways to edit the internal code, and in this article, we will explain the different methods for editing the HTML source code in WordPress.
Why edit the original HTML code?
WordPress plugins and themes have many limitations for customizing site elements or changing the look and feel. To style your site the way you want, you need to edit the HTML code in WordPress to get exactly the features you are looking for in a site. Thus, it provides control and flexibility on how your site will look, function, and the ability to identify and correct possible errors. Here are some of the simple cases where you need to edit the original HTML:
- You want to change the font-family of a paragraph element on a specific page.
- You must copy and paste the entire content of the message and modify the code.
- Wanted to add a custom CSS class to multiple elements on the page.
How to edit HTML source code in WordPress?
Depending on your need, you can change the appearance of the site in one of the following ways using HTML editing. We’ve looked at various options, including ways to insert HTML code, although they don’t actually edit existing code.
1. Code Editing in the Gutenberg Block Editor
The Gutenberg block editor makes it easy to edit source HTML in visual mode. Once the raw HTML of your WordPress site is visible, continue editing by changing text styles, adding hyperlinks, or any other code of your choice on your page/post. But first, there are three ways to edit a page or post in Gutenberg, and here they are:
1.1. Editing the HTML of a Single Block
Let’s say you have a paragraph block and want to edit its source HTML. First select the block you want to edit and click on the three menu dots. Select the “Edit as HTML” option as shown below:
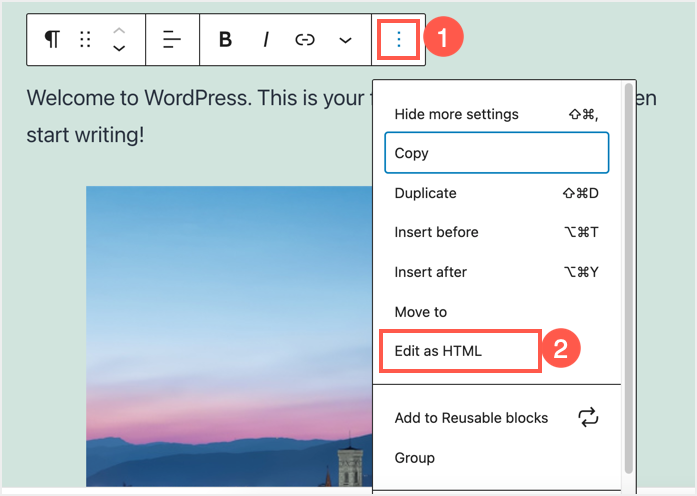
Select Edit as HTML.
You will see the source of the selected elements and be able to edit it in the editor.

Change the HTML source of an element
When you’re done editing the code, click on the three-dot menu and choose “Edit Visually” to return to the text/original view.
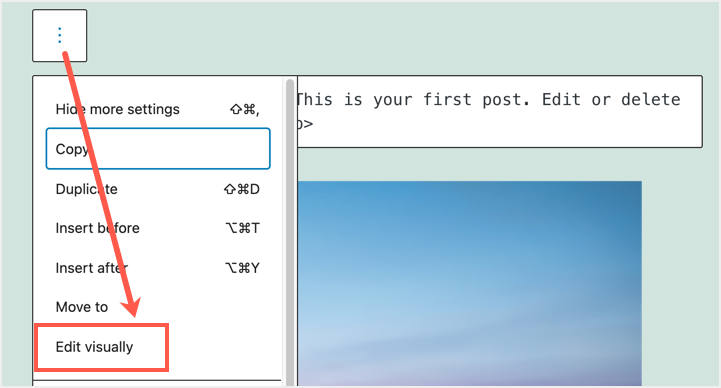
Back to Editing Visually
1.2. Editing the HTML of the entire page/post
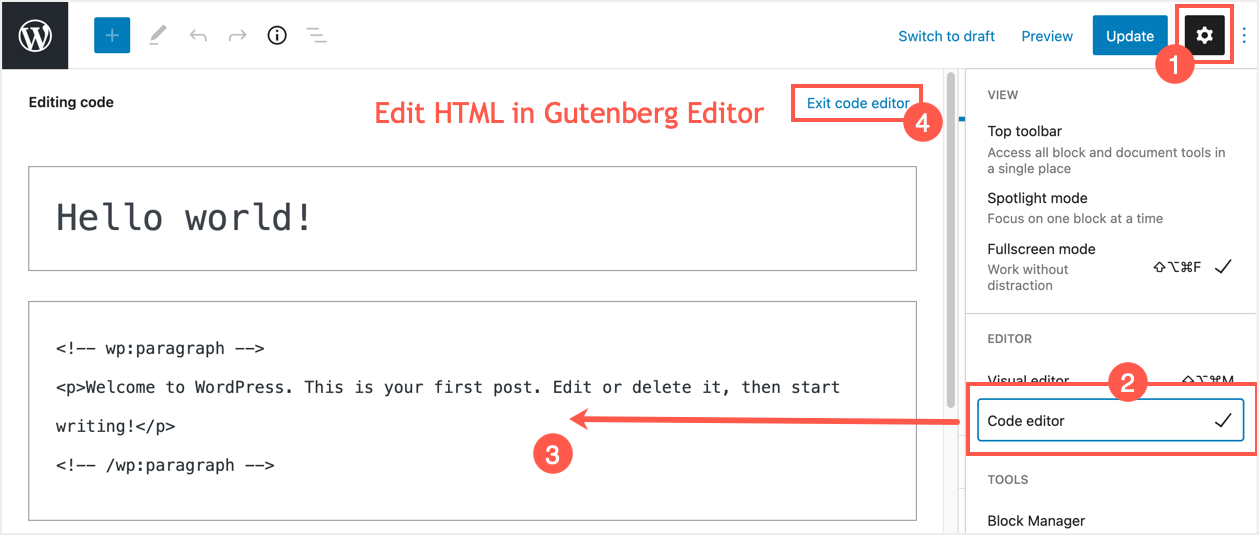
Find the three dots in the upper right corner of the current page or post and click on it. Select “Code Editor” from the drop-down menu.
Edit HTML in Gutenberg Editor
This way you can view the source code of all your content and edit them. once editing is complete, click the three dots again and select “Visual Editor” to exit. Alternatively, you can click on the “Exit Code Editor” option to close the Code Editor.
1.3. Inserting custom CSS into elements
Gutenberg also allows you to add your own CSS class to any block on the page. Select the block and go to the “Block” section on the right sidebar. Scroll down and add your own CSS class to the “Additional CSS Classes)” section. You can add multiple CSS classes by separating them with commas.

Add Custom CSS
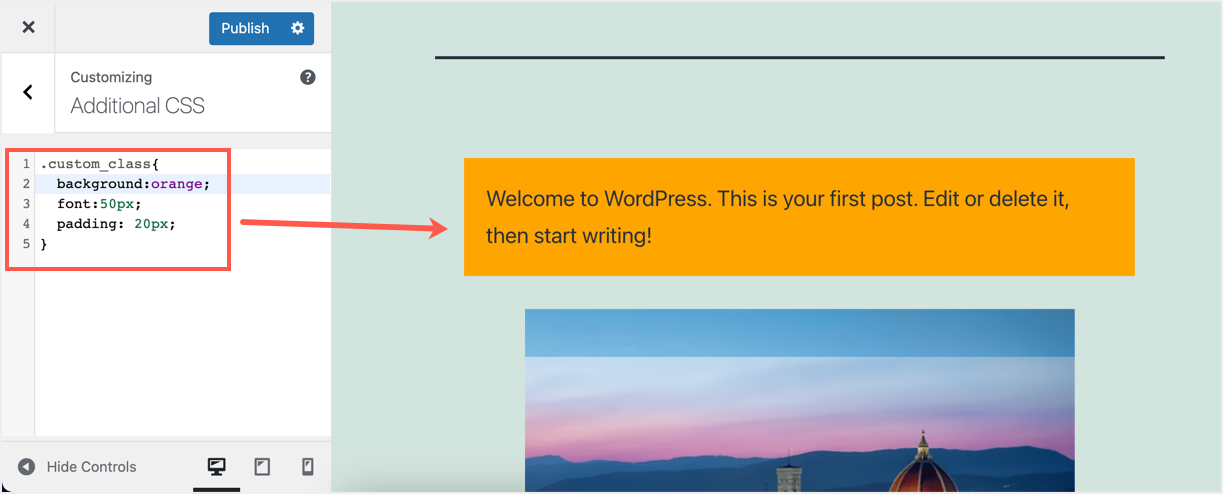
After updating or publishing a post, go to Appearance > Customize > Additional CSS. Here you can add your own CSS for the class you added in the editor. you can preview current changes and publish them when you’re done.
Add Custom CSS to HTML
1.4. Inserting code using a custom HTML block
This method requires you to add content to your page or post by writing HTML code, usually from scratch.
- Start by clicking on the plus sign (+) in the top left corner of an existing/new page or post.
- You will see “Custom HTML” under the “Widgets” menu category.
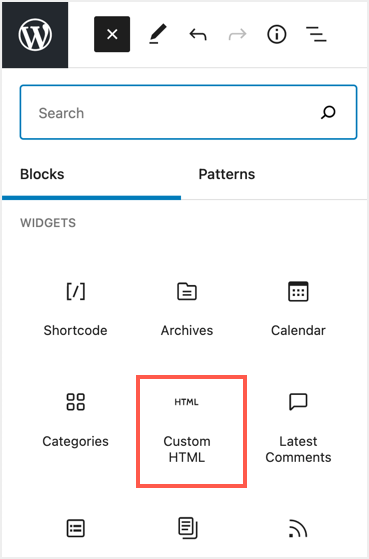
Custom HTML Block
- Alternatively, you can search for “Custom HTML” by entering a keyword in the search box.
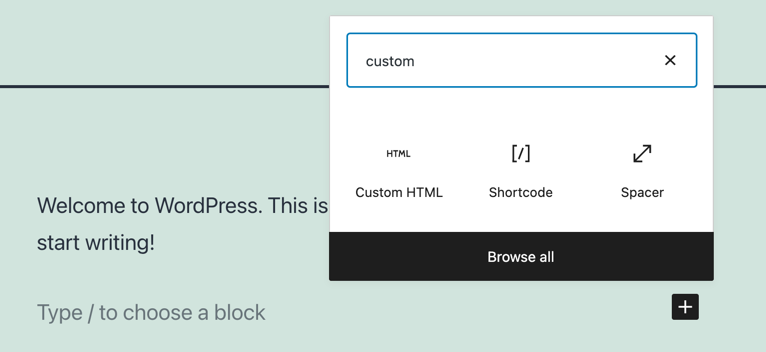
Finding and Inserting a Custom HTML Widget
- Then click on it and start writing your HTML code.
- Use the Preview tab to check how your live site looks while you code.
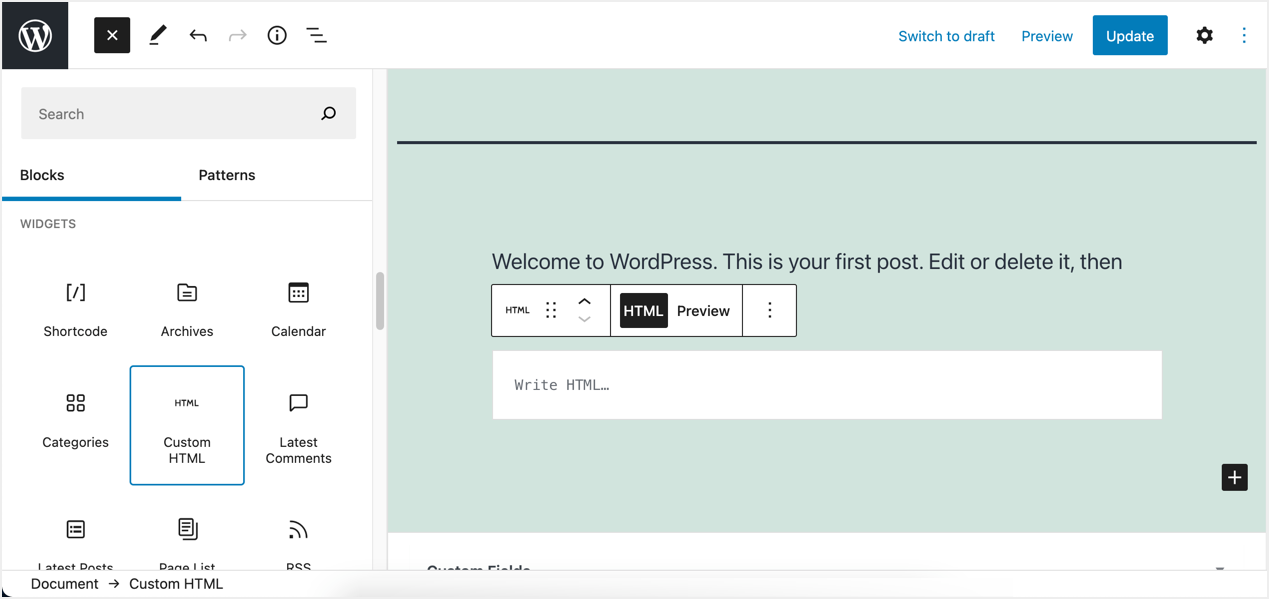
Insert and Preview Custom HTML
2. Edit the original HTML code in the classic editor.
If you are using the classic editor on your WordPress site, the text view is what you need to access and edit the post/page HTML code. Just click the Text tab in the classic editor to start making changes to the code, and you can return to normal view after editing by clicking the Visual tab.

Edit HTML in a classic text editor
Frequently used HTML tags are available as menu buttons to use while editing your site.
3. Paste the HTML code into the widget area.
Similar to using custom HTML in the content area, you can use the same block to insert your HTML into the widget area. You use “Custom HTML” in widgets to customize the header, sidebar, footer, or other sections of your WordPress site.
- From your WordPress dashboard, select “Appearance” and then click “Widgets”.
- Depending on the theme you’re using, expand the “dropdown” tab of any of the widgets and click the + icon that says “Add Block”.
- Then select “Custom HTML”.
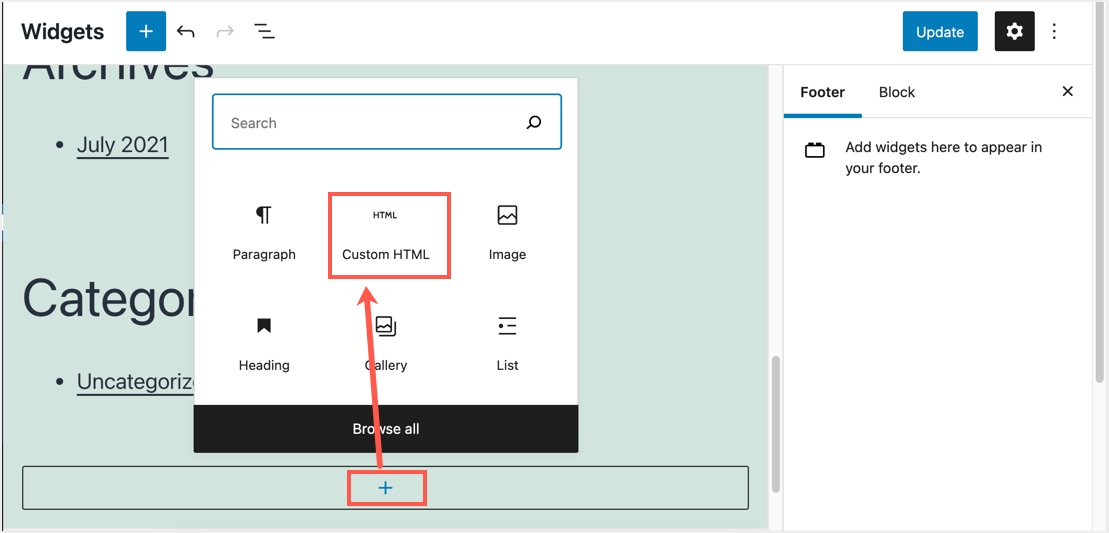
Add widgets to footer and sidebar
- Enter your HTML code and finally click “Update” to apply the changes you’ve made to the live site.
4. Edit the HTML code in the theme and plugin editors.
This is not entirely recommended though, as any small mistake while editing a theme can render your site unusable. You should back up your site before making any changes, and any update you make to the theme after editing the code will cause all changes you made to be lost. Alternatively, use a child theme so that updating the parent theme won’t affect your changes to the child theme.
- To get started, click Appearance and then Theme Editor.
- You will receive a warning message, and clicking the “I understand” button will give you access to make changes to the theme.
- In the theme editor interface shown, click on the file you want to work with and start editing its HTML codes.
- After editing is complete, please click “Update File” to save your changes.
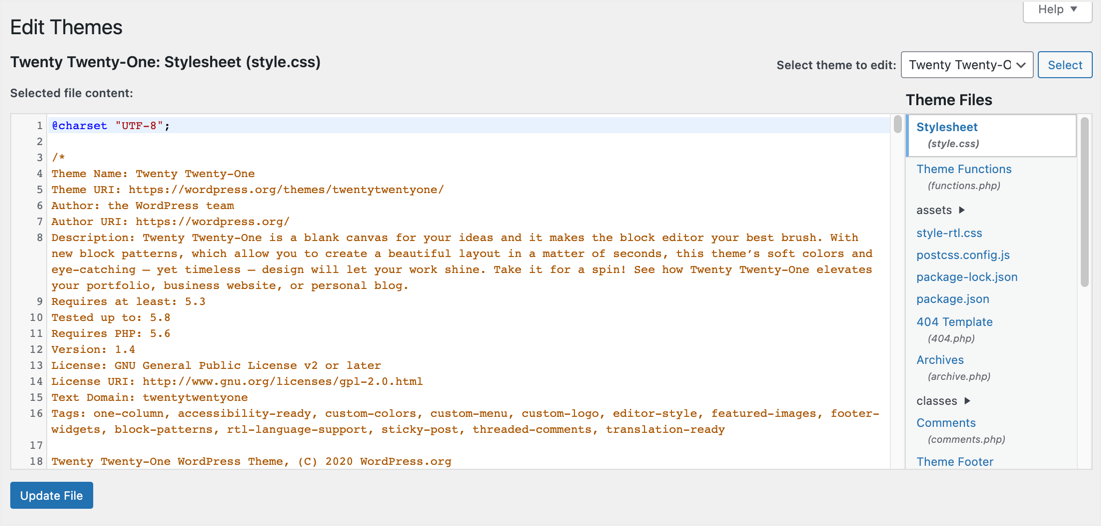
Edit HTML in Theme Editor
Similarly, you can edit plugin files in Plugins > Plugin Editor. Remember that these editors usually contain CSS and PHP files for your theme and plugins. You can edit CSS and update HTML inside PHP files to change HTML elements.
5. Edit the HTML code using FTP or a file manager.
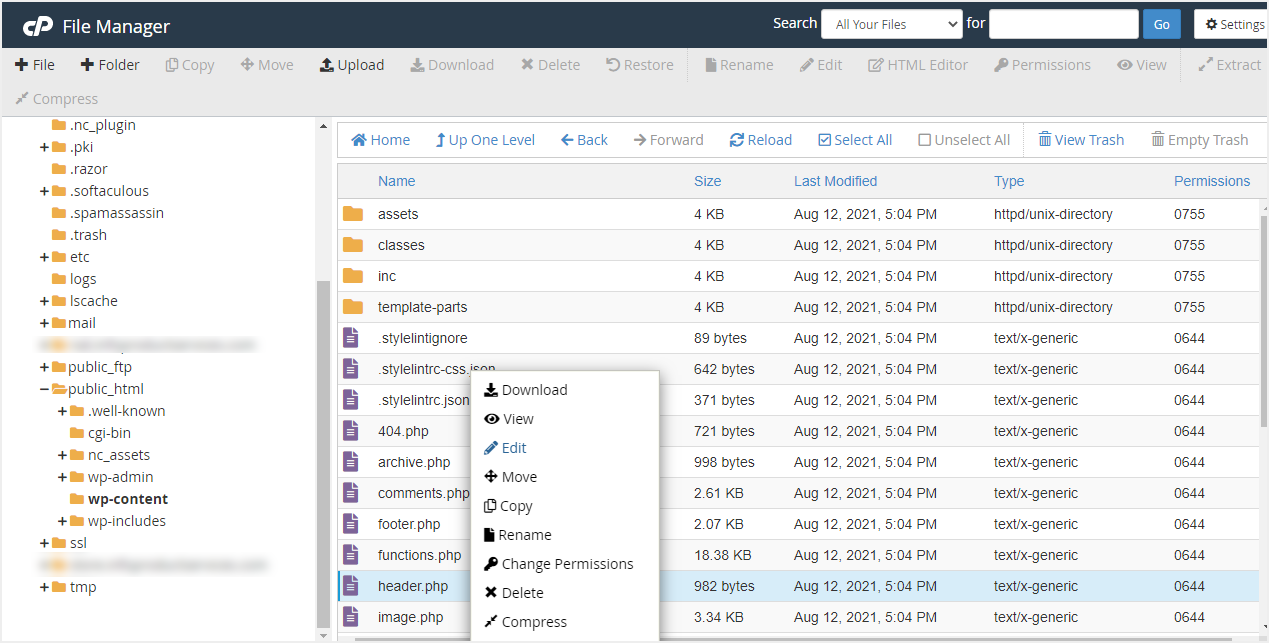
The File Manager app in the hosting panel is a standard feature available for all sites developed with WordPress. This is an alternative to and much preferable to the HTML editing methods listed above in WordPress.
- Start by logging into your hosting account by providing your login details. If you are using cPanel, login to your cPanel with the URL: yoursitename.com/cpanel .
- After logging in, you will see the different folders or files that make up your site.
- Find and click “File Manager” to select the “public_html” folder.
- Select “wp-content” and click “themes”.
- Finally, touch the file you want to edit. For example, you may need to edit your header.php file to make changes to the HTML in the header section of your site.
- Select a character encoding and then click the Edit button to continue.
- For “Edit” there is a better option – “Download”. It is recommended to use it because convenient or correct editing is available on your personal computer. once editing is complete, upload the file back to replace the current theme folder.
Edit HTML in File Manager
Again, there won’t be many HTML files in WordPress themes and folders. You need to edit the HTML content inside the correct PHP files to achieve the required functionality. Instead of using the File Manager app, you can also use FTP to log into your server remotely and edit source files.
6. Using a Plugin to Edit Code
We recommend using one of the above methods to edit or add HTML code to your WordPress site without using third party plugins. However, plugins can help organize your edits, especially if you’re pasting a lot of HTML into post content. There are different types of plugins available in the WordPress repository and you can use them depending on the purpose:
- Insert HTML Fragment is a simple plugin to create HTML widgets and insert anywhere in the content and widget area.
- Insert Header and Footer is a useful plugin for inserting code into the header and footer area of your website.
- Code Snippets – If you want to edit your functions.php file and apply a new function throughout your site, then this plugin is for you.
Final words
While WordPress is running PHP, the final output is delivered to the browser in the form of static HTML files. When you look at the page’s source code in a browser, you will only see a pure HTML page that includes CSS and JavaScript content. Editing in the classic editor or the Gutenberg editor is a good option for changing the HTML of certain elements on the page. You can use other file editing options to change HTML content inside PHP files.