Google AdSense is the official WordPress plugin from Google for adding AdSense ads to your WordPress site. The plugin allows you to choose each template of your site and place ads according to your needs. For example, you can place 300×600 ads in the sidebar for blog posts only, and disable the display of ads on any particular page. The plugin also includes a verification tool for your Google Webmaster Tools account and places ads on verified sites as recommended by AdSense publishers.
Adsense plugin for WordPress Google changed the name of the plugin to “Google AdSense” from “Google Publisher”. Later, Google also stopped supporting this WordPress plugin. We have left this article for historical reference only, check out the separate article on how to embed ads on a WordPress site.
Installing and using the plugin
Go to the WordPress Plugin Repository and install the Google AdSense Plugin . Activate the plugin and go to the settings page under Settings > AdSense. The first step is to verify your site with your Webmaster Tools account and then click on the “Manage Ads” button available in the “Ads Manager” field.
Features of the Google AdSense Plugin for WordPress
The plugin offers three main features:
- Website Verification with Google Webmaster Tools Account
- An ad manager to add ads to your content
- Automatic advertising for mobile devices
Before using the Google AdSense plugin, you must verify your site with a Webmaster Tools account. Once your site is verified, click “Manage Ads” in the “Ads Manager” section to place ads on your site. Google will first analyze your site for the best ad placement, and at the moment custom templates are not supported for ad placement, although you can still use the plugin in custom templates.
Site analysis will show if your site has issues, such as existing ad codes and custom templates, or if everything is fine.
After analysis, you can choose a template such as “One Page” or “One Post” and start advertising. The plugin will automatically show suitable places on the selected template where advertising is supported.
You can simply click on the placeholder to create an ad in that location and change your ad settings by clicking on the gear icon. If you haven’t found a suitable location, you can add locations manually by editing the theme’s php files.
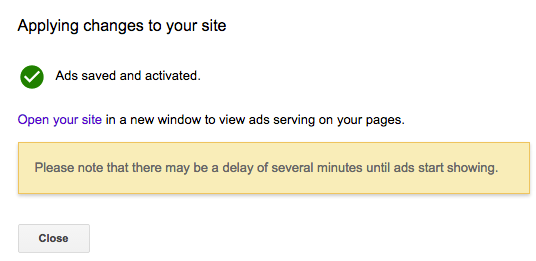
Click the “Save and Activate” button to enable ad serving and it will take some time for Google to start showing ads.
Advertising management
The next step is to enable the Automated Mobile Ads option so that your ads will convert to a mobile-friendly layout when viewed on mobile devices.
“Ads Manager” is used to serve ads that will be displayed on desktop and mobile devices in the same format. For example, if you run an ad with a 728×90 horizontal banner without activating Automated Mobile Ads, then the same ad format will be displayed on both desktop and mobile devices. “Automated Mobile Ads” will change the format of ads for viewing on mobile devices, possibly in 300 × 250 format.
Once you activate your placements, Google will automatically create ads in your AdSense account, which can be seen in the My Ads tab. Any ad changes you make to your AdSense account will be reflected on your site.
Disabling ads on specific pages
According to AdSense rules, you can’t advertise on pages like “Newsletter” or “Thank you”. Google has made this possible by adding the “Disable ads on this page” option in the WordPress page editor. Disabling ads is only possible on pages and it is not possible to disable ads in specific posts.
This is Google’s base plugin for WordPress publishers, but Google still has a long way to go to improve the plugin with additional features and reporting features.
Posting ads in WordPress with the Google AdSense plugin
Google will begin to analyze your site and display the appropriate message. Custom post templates are not supported by AdSense, although ads can be placed. Google does not guarantee perfect display and placement in custom post types. You can select a template file to see the placeholders where Google determines how ads can be placed.
If the placeholders provided meet your requirements, you can add three ads according to the Google AdSense Publisher Guidelines and activate your changes. If the plugin doesn’t detect the place where you want to place ads, you need to modify the core theme files to create the place.
Google servers need time to catch the changes and display ads on your site. Each ad placement will add related ad units to your AdSense account, which can be seen in the “My Ads” tab. You can change the ad style in your AdSense account.
Modifying Theme Files to Create Ad Spaces
Let’s say you want to add an ad below the content of a post, and the default plugin doesn’t detect this place. Then go to “Appearance > Editor” and select the php file for your post (usually called “single_post.php”). Place the below code at the end of the php file and update the file.

Give your ad any unique name.
Now go back to the plugin and find the ad placement in the single post template. You’ll find a placeholder under your content exactly where you placed the ad code.
Normally the ad is displayed on the live site when posted, but if you want to preview the embed block outside of the AdSense plugin, change the above code from “display:none” to “display:block” so that the adblock can be viewed during your testing or any other developments.
Once you’ve completed your placements, don’t forget to change the code back to “display: none”.
If you see the placeholder in gray, then the plugin thinks that the area where you pasted the code is inactive and you may need to use another area to create the placeholder area.
Adding AdSense Ads to the Sidebar and Footer
With the Text widget, it’s very easy to add ads to your sidebar or footer. Drag the Text widget and paste the code below into the text area.
Give your ad any unique name.
Setting up ad format for mobile devices
When placing ads through the “Ads Manager”, the ads will be displayed on both desktop and mobile devices, but the problem is that the ad format will not be adapted to mobile devices. For example, if you placed a 728×90 banner in the header of your website, the same size ad will be displayed on mobile, making it not very attractive.
Activate Automated Mobile Ads settings to automatically target ads to mobile devices. In the example above, the ad format will be changed to 320×50 when viewed on mobile devices.
Google Adsense plugin for WordPress
- Reliability – 10/10
- Ease of use – 9/10
- Mobile advertising – 10/10
- Reporting and ad blocking – 0/10
- Ad placements – 6/10
7/10
Summary
The AdSense plugin allows publishers to easily add ad code along with webmaster verification tools and automatic mobile advertising. Hopefully Google will offer a lot of reporting and ad blocking features in the plugin.
pros
- Official Google plugin, so no need to worry about ad placement rules when using default ad placement.
- Ads are automatically adjusted for desktop and mobile devices.
- Built-in site verification with a Webmaster Tools account.
- You can combine regular ads and plugin ads up to the allowed amount.
Minuses
- The plugin does not allow you to place ad units with links.
- Doesn’t offer an option to turn off ads in certain posts.
- Placing ads in certain places looks very crowded without enough space between content and ads.
- There are no built-in statistical reports in the plugin.